What do you want to see?

As of now, we can create a new post and we can show one hard-coded post. It’s almost time to add some structure and navigation to our app. Let’s show a list of posts first, though, and we can think about how we navigate between items later.

Let’s add a list component to show all the posts. We’ll fake it in the front end…

export function Main() {
  return <div id='main'>
    <Editor onSubmit={create} />
    <List />
  </div>
}
// /javascript/posts/List.jsx
export default class List extends React.Component {
  render() {
    return 'list of posts'
  }
}

… until we have the backend in place.

The posts.index action in PostsController will return the React application if you request HTML and a list of posts if you request JSON.

# PostsControllerTest.rb
  
test 'the index page just returns the react application' do
  get posts_url
  assert_select '#react'
end

test 'fetch a list of posts as json' do
  get posts_url(format: :json)
  assert_response :success
  json = JSON.parse response.body, symbolize_names: true

  assert 1, json[:posts].count
  assert 'The title', json[:posts][0][:title]
end
# PostsController.rb

def index
  @posts = Post.all.order(created_at: :desc)
end

# index.json.jbuilder
json.posts do
  json.array! @posts do |post|
    json.extract! post, :id, :title, :body, :created_at, :updated_at
  end
end

And, if I open http://blogging.local:3000/posts.json in the browser, I see my posts. Now to fetch them from the client.

I’ll add an API methods to fetch the list of posts…

// posts/api.js

export function list() {
  return server.get(`/posts.json`)
}

…and update the List component to call it and render the list.

export default class List extends React.Component {
  constructor(props) {
    super(props)
    this.state = {
      posts: null
    }
  }

  render() {
    const {posts} = this.state
    if(posts === null) return 'Loading…'

    return <ul className='posts-list'>
      {
        posts.map(post => <li key={post.id}>
          <Post post={post}/>
        </li>)
      }
    </ul>
  }

  async componentDidMount() {
    const response = await list()
    this.setState({posts: response.posts})
  }
}

That’s all straightforward, I think, except: note the key property in <li key={post.id}>.

React performs optimisations by keeping track of changes to the React component tree and only re-rendering components that have changed since the last render. When you render an array of components you should provide a unique key to each component to help React figure out what has changed.

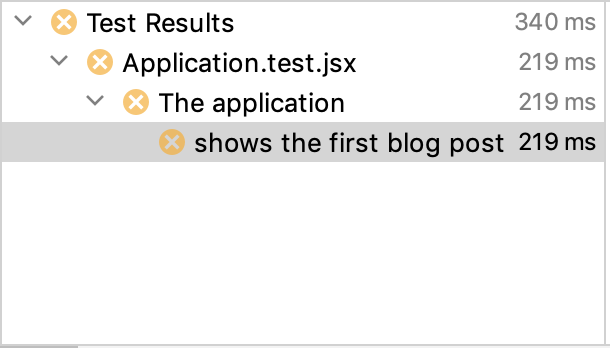
If I run all the Javascript tests now, I see a failure in the top-level Application.test.jsx because it is still expecting a single Post component rather than a list.

Let’s fix that.

// Application.test.jsx

describe('The application', () => {
  server.send = jest.fn()

  const post = {
    id: 1,
    title: 'React on Rails',
    body: 'I can use React with Rails.',
  }

  const posts = [post]

  beforeEach( () => {
    // Return a list of posts instead of a single post
    server.send.mockReturnValue({posts})  
  })

  test('shows a list of blog posts', async () => {
    const component = await display(<Application />)
    component.update()

    assert_select(component, '.site-name',   'Blogging')
    assert_select(component, '.post .title', 'React on Rails')
    assert_select(component, '.post .body',  'I can use React with Rails.')

    expect(server.send).toBeCalledWith('/posts.json')
  })
})

I’m not sure why, but I had to add component.update() to get the list component to render the correct HTML (I think this might be a bug in Enzyme).

I like to think of the top-level Application.test as a kind of smoke test that tests the whole application from end to end, albeit in a rather shallow fashion. It won’t tell us anything profound about the application’s behaviour but it might flag some future regression that would be missed by lower-level unit tests.

As I did with the Post.test, I’ll duplicate this test as a unit test so I can test the List component more thoroughly. But first I am going to split the component into a List that knows how to render a list of posts and a ConnectedList that knows how to fetch a list of posts from the server.

This seems like a lot of faff when I am typing it into WordPress but it’s literally 10 seconds of copy-paste in the IDE and my future self will thank me when I need to write more complex tests and I can do so without loading the whole framework.

Here’s the code.

// posts/List.jsx

export function List({posts}) {
  return <ul className='posts-list'>
    {
      posts.map(post => <li key={post.id}>
        <Post post={post}/>
      </li>)
    }
  </ul>
}

export default class ConnectedList extends React.Component {
  constructor(props) {
    super(props)
    this.state = {
      posts: null
    }
  }

  render() {
    const {posts} = this.state
    if(posts === null) return 'Loading…'
    return <List posts={posts} />
  }

  async componentDidMount() {
    const response = await list()
    this.setState({posts: response.posts})
  }
}

And here are the tests: one for the List and one for the ConnectedList.

// posts/List.test.jsx
describe('The post list', () => {
  server.send = jest.fn()

  const post = {
    id: 1,
    title: 'React on Rails',
    body: 'I can use React with Rails.',
  }
  const posts = [post]

  test('shows a list of blog posts', () => {
    const component = display(<List posts={posts}/>)

    assert_select(component, '.posts-list .post', 1)
    assert_select(component, '.post .title', 'React on Rails')
    assert_select(component, '.post .body',  'I can use React with Rails.')
  })

  test('fetches the list of blog posts from the server', async () => {
    server.send.mockReturnValue({posts})

    const component = await display(<ConnectedList />)
    component.update()

    assert_select(component, '.posts-list .post', 1)
    expect(server.send).toBeCalledWith('/posts.json')
  })
})

A quick test in the browser shows that I can show a list of posts from the server and I can create a new one except… Ooops!… the new one doesn’t get added to the list unless I refresh the page.

This is the kind of problem that Redux will solve for us but I have a different approach in mind. We’ll give it a try in the next episode.

To the Server!

In the previous episode, we created a new post but we still need to send it to the server. We’ll add some code to do that now in api.js.

// api.js
export function create(post) {
  const request = {
    url: '/posts.json',
    method: 'post',
    data: {post},
  }
  return axios(request)
      .then(response => console.log(response.data))
      .catch(error => console.log(error))
}

And we’ll link it to the post editor in Main.js.

export function Main() {
  return <div id='main'>
      <Editor onSubmit={create} />
      <Post id={1}/>
    </div>
}

Let’s give it a try…

Oh, dear! The console says…

POST http://blogging.local:3000/posts.json 422 (Unprocessable Entity)

…and the rails log says the problem is ActionController::InvalidAuthenticityToken.

Rails adds the CSRF token to forms automatically but we need to take care of that ourselves in this brave new world. The default rails layout adds the CSRF token to the header and we can access it with this code.

export function getCSRFToken() {
  const csrfTag = document.querySelector('meta[name=csrf-token]') 
  return csrfTag?.content || 'missing-csrf-token'
}

We’ll add it to our request like this.

    const request = {
      url: '/posts.json',
      method: 'post',
      data: {post},
      headers: {
        'X-CSRF-Token': getCSRFToken(),
      }
    }

I try again and now my post succeeds. The result shows up in the console. Huzzah!

{id: 28, title: "New post", body: "with a body", created_at: "2021-04-17T13:26:38.531Z", updated_at: "2021-04-17T13:26:38.531Z"}

It would be lovely if our new post showed up on the screen — and we’ll get to that in a bit — but let’s do some tidying first.

I’ll move the post code to server.js and consolidate get with post.

class Server {
  get(url)        { return this.send(url)}
  post(url, data) { return this.send(url, 'post', data) }

  send(url, method, data) {
    const request = {
      url: url,
      method: method,
      data: data,
      headers: {
        'X-CSRF-Token': getCSRFToken(),
      }
    }
    return axios(request)
        .then(response => response.data)
        .catch(error => console.log(error))
  }
}

export const server = new Server()

So now the code in api.js is just…

export function fetch(id) {
  return server.get(`/posts/${id}.json`)
}
export function create(post) {
  return server.post('/posts.json', {post})
}

To recap, we can display a single post and we can create a new post. Let’s show a list of all the posts next.

A Request to be Mocked

We’re starting the day with a failure.

The application test fails because it is trying to make a network request and, as everyone knows, we don’t want to make network requests in unit tests.

I suppose I could change the Application.test to use shallow() instead of mount() but then we wouldn’t actually be testing very much — and we’ll have to deal with this network request problem eventually.

Axios comes with an API for mocking network requests but it all feels a bit low-level to me.

What I’d like to do is refactor the code so that it is easy to switch out the network layer entirely when we are testing. Let’s introduce an API layer with a function to fetch posts.

We’ll start by extracting a method fetchPost(), then convert it to be an async function and await the response in componentDidMount(). Then, finally, we’ll move the function to its own file.

I’ll just show the final result.

// posts/api.js
import * as axios from 'axios'

export function fetch(id) {
  const request = {
    url: `/posts/${id}.json`
  }
  return axios(request).then(response => response.data)
}
// posts/Post.jsx
import {fetch} from './api'

  ...

  async componentDidMount() {
    const post = await fetch(1)
    this.setState({post})
  }

axios() returns a promise with the response and we only care about the data in the response. We’ll worry about errors later.

ConnectedPost waits for the data in an async method.

We’re not done yet because I’d like to introduce one more level of indirection. I want to abstract away the call to the server partly because this code will end up being used in a bunch of places and partly because that’s where I want to introduce my cleavage point for mocking.

All problems in computer science can be solved by another level of indirection.

David Wheeler
// remote/server.js
import * as axios from 'axios'

export const server = {send}
function send(url) {
  const request = {url}
  return axios(request).then(response => response.data)
}
// posts.api.js
import {server} from 'remote/server'

export function fetchPost(id) {
  return server.send(`/posts/${id}.json`)
}

There. That looks much nicer and now we are finally ready to mock out that server connection In Application.test.jsx.

import {Application} from 'application/Application'
import {server} from 'remote/server'

describe('The application', () => {
  server.send = jest.fn()

  const post = {
    id: 1,
    title: 'React on Rails',
    body: 'I can use React with Rails.',
  }

  beforeEach( () => {
    server.send.mockReturnValue(post)
  })

  test('shows the first blog post', async () => {
    const component = await mount(<Application />)

    expect(component.find('.site-name').text()).toEqual('Blogging')
    expect(component.find('.title').text()).toEqual('React on Rails')
    expect(component.find('.body').text()).toEqual('I can use React with Rails.')

    expect(server.send).toBeCalledWith('/posts/1.json')
  })
})

Jest has a really nice syntax for creating mock functions. jest.fn() returns a function that you can manipulate to set the return value. I’m mocking the send() function in our server object.

CircleCI says that all is good with the world once more.

Meet me in the Middle?

Story so far:

  • We have a Rails back end that can serialize a blog post to JSON.
  • We have a React front end that can render a blog post.

In this instalment, we want to connect the two together. Let’s do a bit of tidying first.

It sucks that our Application component is doing everything. Let’s extract a Post component. Test first.

I’ll start by copy-pasting application/Application.test.jsx to posts/Post.test.jsx and then strip out the non-post stuff.

describe('The post component', () => {
  test('shows a blog post', () => {
    const component = mount(<Post />)
    expect(component.find('.title').text()).toBe('React on Rails')
    expect(component.find('.body').text()).toBe('I can use React with Rails.')
  })
})

I’ll do the same thing with a Post component and check that all the tests still pass.

import React from 'react'

export function Post(_props) {
  return <div className='post'>
    <h2 className='title'>React on Rails</h2>
    <div className='body'>I can use React with Rails.</div>
  </div>
}

Now I’ll change Application to use the Post component and get rid of the duplication.

import React from 'react'
import {Post} from 'posts/Post'

export function Application(_props) {
  return <div id='application'>
    <h1 className='site-name'>Blogging</h1>
    <Post />
  </div>
}

The tests still pass. Refactoring successful. There’s some overlap between Application.test and Post.test but I’m OK with that.

We’re almost ready to hook the Post component up to the backend but there’s one more fake it step we can take on the road to making it. Let’s pass the post data into the Post component so it doesn’t need to concern itself with where its data came from. Small steps are the best steps.

I’m going to introduce a mediating component between Application and Post that will be responsible for fetching the data. I’ll use the convention ConnectedXXX for a component that connects a view to its data provider.

Here it is (the data is still hard coded for the moment).

export function Post({post}) {
  return <div className='post'>
    <h2 className='title'>{post.title}</h2>
    <div className='body'>{post.body}</div>
  </div>
}

export default function ConnectedPost() {
  const post = {
    id: 1,
    title: 'React on Rails',
    body: 'I can use React with Rails.',
  }
  return <Post post={post} />
}

Notice that I used the default modifier when I exported the ConnectedPost. You can export multiple components (or functions or constants or whatever) from each Javascript file but only one of them can be the default.

When you import a component from another file, you can use named imports like this:

// Application.jsx
import {Post} from 'posts/Post'
...
<Post />

If I skip the braces and import the default export (ConnectedPost), I can call it whatever name I like. I’m gonna continue to call it Post (because the caller doesn’t need to know about implementation details like data providers), like this:

// Application.jsx
import Post from 'posts/Post'
...
<Post />

I won’t show the import statements in my code snippets any more unless there is something significant that I want to draw your attention to. The basic rules to remember are:

  • If you use a component from another file, you have to import it.
  • Remember to indicate whether you want the default component or a named component.
  • Import React in any file that uses JSX.

RubyMine takes care of imports for me magically so I am barely aware of them most of the time anyway.

Now that the post object is no longer hard-coded, we can update Post.test.jsx as a unit test for Post and pass the post in from the outside. We’ll test the ConnectedPost separately later.

  const post = {
    id: 1,
    title: 'The title',
    body: 'The body.',
  }

  test('shows a blog post', () => {
    const component = mount(<Post post={post}/>)
    expect(component.find('.title').text()).toEqual('The title')
    expect(component.find('.body').text()).toEqual('The body.')
  })

Before I do the next interesting change I need to introduce some new concepts. Let’s start with class components.

Class components

All of our components so far have been stateless so it makes sense that they are pure functions. We’ll need to maintain state for our ConnectedPost when it retrieves data from the server so we are going to convert it to a class component.

Aside: The React folks have added hooks to allow you to maintain state in a functional component but the whole thing still feels weird to me. I’m sticking with class components for now.

export default class ConnectedPost extends React.Component {
  render() {
    const post = {
      id: 1,
      title: 'React on Rails',
      body: 'I can use React with Rails.',
    }
    return <Post post={post} />
  }
}

This class component is exactly equivalent to the functional component that it replaced with all the rendering logic moved into a method called render().

Functional components are passed their properties as parameters to the render method like this render(props). Class components access their properties through an instance variable: this.props.

Class components give us two new capabilities. The first is state management.

State Management

React gives us a this.state instance variable that lets us keep track of internal changes to a component like when the user checks a box or presses a button. In our case, we are going to keep track of the post that we are fetching from the server.

There are three aspects to state management.

  1. Initialize the state in the constructor.
  2. Access the state in the render() method (and other methods as necessary).
  3. Change the current state with this.setState().

The reason we are letting React manage our state rather than just using an instance variable is to give React the chance to re-render our component every time the state changes.

Let’s look at the first two aspects together. I’ll change the component to initialize the state with an empty post in the constructor and then access that post in the render() method.

export default class ConnectedPost extends React.Component {
  constructor(props) {
    super(props)
    this.state = {
      post: {}
    }
  }

  render() {
    const {post} = this.state
    return <Post post={post} />
  }
}

Before I show you how to change the state, let me introduce the second capability of class components.

Lifecycle methods

The second new capability of class components is lifecycle methods. Lifecycle methods get called when a component is initialized or when some external event happens that the component needs to know about. The most important lifecycle method is componentDidMount().

You read about other lifecycle methods in the React documentation.

Let’s use componentDidMount() now to change the state when the component is first mounted.

export default class ConnectedPost extends React.Component {
 ...
  componentDidMount() {
    const post = {
      id: 1,
      title: 'React on Rails',
      body: 'I can use React with Rails.',
    }
    this.setState({post})
  }
}

We’re now exactly back to where we started but now we have a place to call out to the server to fetch out post. Let’s do it.

  componentDidMount() {
    const request = {
      url: '/posts/1.json'
    }

    return axios(request).then(response => {
      const post = response.data
      this.setState({post})
    })
  }

I’m using axios rather than fetch. My reason is lost in the mists of time but I remember that fetch did something weird with 404 errors that I found annoying. Use fetch if you prefer.

We have to install axios with Yarn…

yarn add axios

…and import it at the top of the Post.jsx file.

import * as axios from 'axios'

We are finally displaying an actual blog post that we loaded from the server but the new changes broke our tests.

We’ll fix that tomorrow.