POST http://blogging.local:3000/posts.json 422 (Unprocessable Entity)
…and the rails log says the problem is ActionController::InvalidAuthenticityToken.
Rails adds the CSRF token to forms automatically but we need to take care of that ourselves in this brave new world. The default rails layout adds the CSRF token to the header and we can access it with this code.
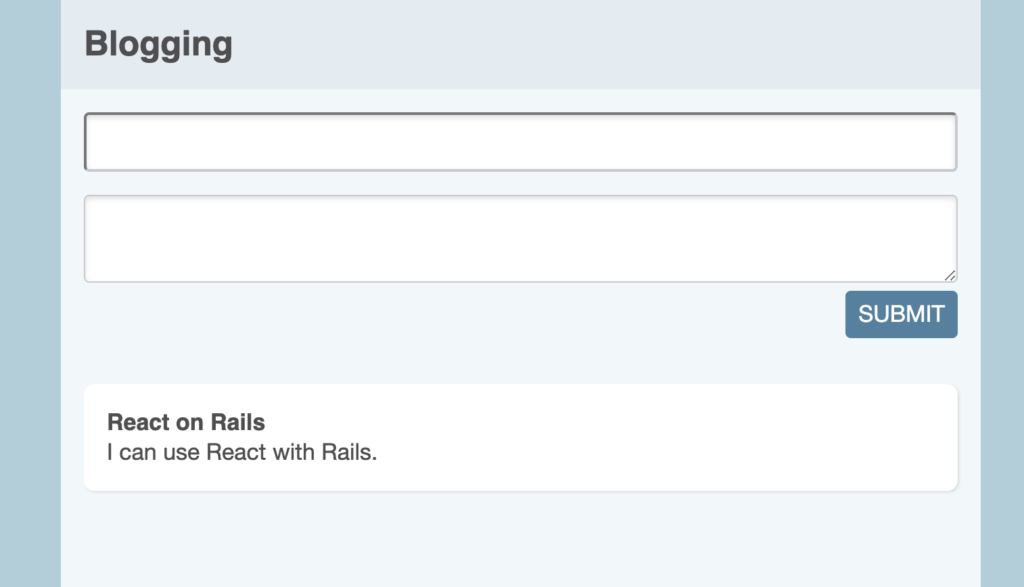
I added a couple of divs and some CSS classes to the top-level elements too. I’ll show you in a bit, but first I am gonna move that form to its own component. I’m not TDDing this bit because I’m kind of stumbling around to find something that works. I’ll test it later.
Here’s the code after tidying the page structure and extracting an Editor.
React has this concept of controlled components versus uncontrolled components. This concept comes to the fore when you use form elements.
Long story short, when we are writing plain HTML forms, we rely on the form elements to manage their own state that they magically send to the server when you hit SUBMIT. In React, we usually manage the state ourselves and do our own submitting.
A component is said to be controlled if its state changes are managed in a containing component. The basic idea is that you store the values from your form elements in React state, then pass them back in as properties when you render the form.
I’ve converted our Editor function to a class so that we can manage its state. I’ve set up some state for the form elements and I’ve added an event handler for the onChange event.
When the user changes the value of the title element or the body element, the onChange event bubbles up to the form element where we handle it and store the value with this.setState(post).
The {…} in the handler is a spread operator. I’m using it to make a copy of post and overwriting one property. React really doesn’t like it when you mutate objects directly and the spread operator provides an easy way to make a copy without changing the original object.
When you submit the form, Editor calls an onSubmit function that was passed in as a property. It calls event.default() first to prevent the page refresh and then writes the current state of the post to the console.
That’s all quite straightforward, I think, except: let me draw your attention to the bind code in the constructor.
this.handleChange = this.handleChange.bind(this)
In Javascript, the value of this is elusive and fleeting and often not what you think it is. In this situation, when our event handler tries to handle the onChange event, the value of this will be null and weird errors result unless you call bind().
All the code is refactored and shiny. The tests look nice and we have the beginnings of a framework but we’ve only completed one story so far.
Let’s work on the next one.
An author can publish a blog post.
I’ve been using (and loving!) the simple_form gem for a while. It’s one of the things from Rails that I miss most after switching to React.
Let’s see if we can reproduce some of that functionality here. There are a lot of moving parts.
We’ll do the rails bit first because it is easy.
# posts_controller_test.rb

  test 'create a blog post' do
    post posts_url(format: :json), params: {
        post: {
            title: 'A new day',
            body: 'First post!'
        }
    }
    assert_response :success
    json = JSON.parse response.body, symbolize_names: true

    # The post was created
    @post = Post.last
    assert_equal 'A new day', @post.title

    # Return the post as JSON
    assert_equal @post.id, json[:id]
    assert_equal 'A new day', json[:title]
  end
class PostsController < ApplicationController
  def create
    @post = Post.new post_params
    if @post.save
      render :show, status: :created, location: @post
    else
      render json: @post.errors, status: :unprocessable_entity
    end
  end

  # ... existing stuff

  def post_params
    params.require(:post).permit(:title, :body)
  end
end
class PostTest < ActiveSupport::TestCase
  test 'post has a title and a body'
  test 'validate the title and body'
  test 'trim the title and body'
end
We’ll use the strip_attributes gem to trim the fields.
# Gemfile
gem 'strip_attributes'
bundle install
class Post < ApplicationRecord
  strip_attributes
  validates :title, length: { minimum: 2, maximum: 255}
  validates :body,  length: { minimum: 2}
end
I’m going to do an experiment on a branch to see if I can make the interface for testing a little easier to read. I want something a bit more like assert_select in Rails.
Let’s see now. Pretending it’s magic…
  test('shows the first blog post', async () => {
    const component = await mount(<Application />)

    check(component).has(
        {
          '.site-name':   'Blogging',
          '.post .title': 'React on Rails',
          '.post .body':  'I can use React with Rails.',
        }
    )
  })
Or, how about this?
  test('also shows the first blog post', async () => {
    const component = await mount(<Application />)
    assert_select(component, '.site-name',   'Blogging')
    assert_select(component, '.post .title', 'React on Rails')
    assert_select(component, '.post .body',  'I can use React with Rails.')
  })
assert_select in Rails allows nesting. Maybe something like this?
 test('shows the first blog post with nesting', async () => {
    const component = await mount(<Application />)

    assert_select(component, '.site-name',   'Blogging')
    assert_select(component, '.post', match => {
      assert_select(match, '.title', 'React on Rails')
      assert_select(match, '.body', 'I can use React with Rails.')
    })
  })
Let’s try the simple (non-nested) version for a while to see how it feels. Here’s a quick implementation.
export function assert_select(component, selector, expectation=1) {
  const selected = component.find(selector)
  switch(typeof(expectation)) {
    case 'string':
      expect(selected.text()).toEqual(expectation)
      break
    case 'number':
      expect(selected.length).toEqual(expectation)
      break
    default:
      expect(expectation).toEqual('string or number')
      break
  }
}
If the expectation is a string, we’ll see if text matches. If it’s a number, we’ll check the number of matches. If you skip the expectation, we’ll just check that there is a match.
Let’s see how it goes. I’ll extract this into a ReactHelper along with a wrapper function for mount() that I will call display().
// test/javascript/helpers/ReactHelper.jsx

import {configure, mount} from 'enzyme'
import Adapter from 'enzyme-adapter-react-16'

configure({ adapter: new Adapter() })

export function display(component) {
  return mount(component)
}
This hides away the fiddly code to initialise enzyme and (SPOILERS) it also provides a handy place to initialise global state should we need that later.
I’ve updated all the tests to use assert_select and the setup code in ReactHelper.
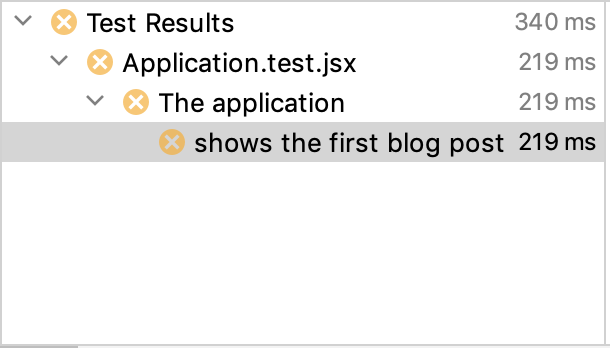
The application test fails because it is trying to make a network request and, as everyone knows, we don’t want to make network requests in unit tests.
I suppose I could change the Application.test to use shallow() instead of mount() but then we wouldn’t actually be testing very much — and we’ll have to deal with this network request problem eventually.
Axios comes with an API for mocking network requests but it all feels a bit low-level to me.
What I’d like to do is refactor the code so that it is easy to switch out the network layer entirely when we are testing. Let’s introduce an API layer with a function to fetch posts.
We’ll start by extracting a method fetchPost(), then convert it to be an async function and await the response in componentDidMount(). Then, finally, we’ll move the function to its own file.
I’ll just show the final result.
// posts/api.js
import * as axios from 'axios'

export function fetch(id) {
  const request = {
    url: `/posts/${id}.json`
  }
  return axios(request).then(response => response.data)
}
// posts/Post.jsx
import {fetch} from './api'

  ...

  async componentDidMount() {
    const post = await fetch(1)
    this.setState({post})
  }
axios() returns a promise with the response and we only care about the data in the response. We’ll worry about errors later.
ConnectedPost waits for the data in an asyncmethod.
We’re not done yet because I’d like to introduce one more level of indirection. I want to abstract away the call to the server partly because this code will end up being used in a bunch of places and partly because that’s where I want to introduce my cleavage point for mocking.
All problems in computer science can be solved by another level of indirection.
// remote/server.js
import * as axios from 'axios'

export const server = {send}
function send(url) {
  const request = {url}
  return axios(request).then(response => response.data)
}
// posts.api.js
import {server} from 'remote/server'

export function fetchPost(id) {
  return server.send(`/posts/${id}.json`)
}
There. That looks much nicer and now we are finally ready to mock out that server connection In Application.test.jsx.
import {Application} from 'application/Application'
import {server} from 'remote/server'
describe('The application', () => {
server.send = jest.fn()
const post = {
id: 1,
title: 'React on Rails',
body: 'I can use React with Rails.',
}
beforeEach( () => {
server.send.mockReturnValue(post)
})
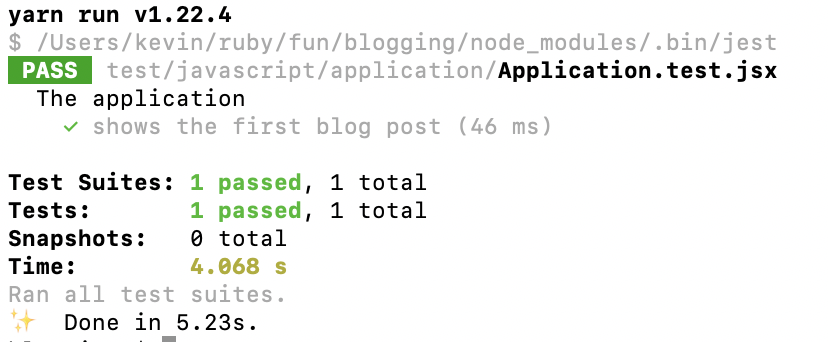
test('shows the first blog post', async () => {
const component = await mount(<Application />)
expect(component.find('.site-name').text()).toEqual('Blogging')
expect(component.find('.title').text()).toEqual('React on Rails')
expect(component.find('.body').text()).toEqual('I can use React with Rails.')
expect(server.send).toBeCalledWith('/posts/1.json')
})
})
Jest has a really nice syntax for creating mock functions. jest.fn() returns a function that you can manipulate to set the return value. I’m mocking the send() function in our server object.
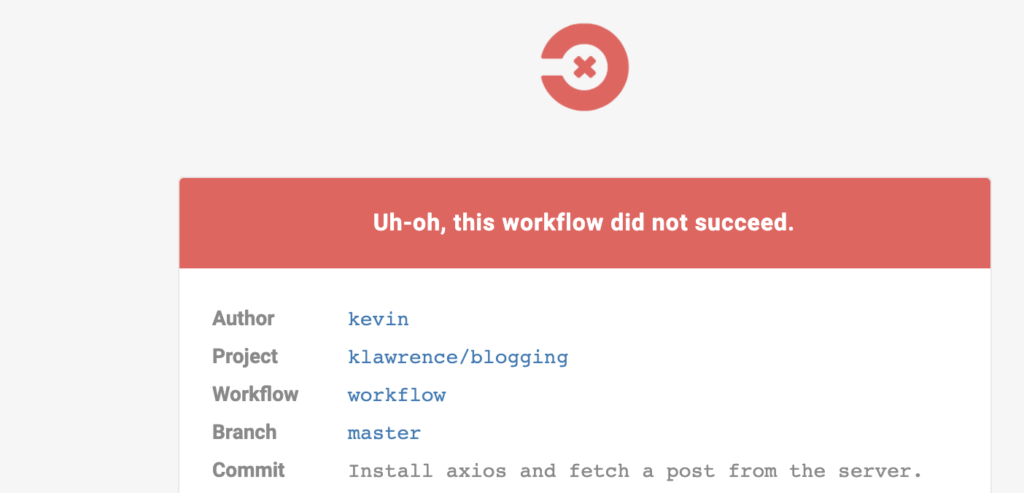
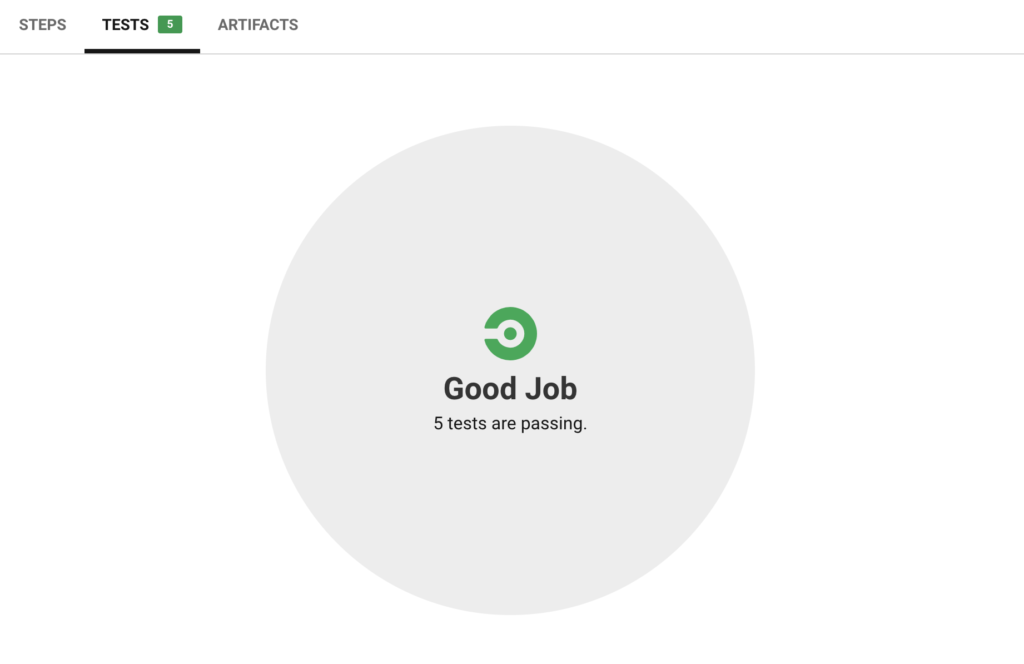
CircleCI says that all is good with the world once more.
We have a Rails back end that can serialize a blog post to JSON.
We have a React front end that can render a blog post.
In this instalment, we want to connect the two together. Let’s do a bit of tidying first.
It sucks that our Application component is doing everything. Let’s extract a Post component. Test first.
I’ll start by copy-pasting application/Application.test.jsx to posts/Post.test.jsx and then strip out the non-post stuff.
describe('The post component', () => {
  test('shows a blog post', () => {
    const component = mount(<Post />)
    expect(component.find('.title').text()).toBe('React on Rails')
    expect(component.find('.body').text()).toBe('I can use React with Rails.')
  })
})
I’ll do the same thing with a Post component and check that all the tests still pass.
import React from 'react'

export function Post(_props) {
  return <div className='post'>
    <h2 className='title'>React on Rails</h2>
    <div className='body'>I can use React with Rails.</div>
  </div>
}
Now I’ll change Application to use the Post component and get rid of the duplication.
import React from 'react'
import {Post} from 'posts/Post'

export function Application(_props) {
  return <div id='application'>
    <h1 className='site-name'>Blogging</h1>
    <Post />
  </div>
}
The tests still pass. Refactoring successful. There’s some overlap between Application.test and Post.test but I’m OK with that.
We’re almost ready to hook the Post component up to the backend but there’s one more fake it step we can take on the road to making it. Let’s pass the post data into the Post component so it doesn’t need to concern itself with where its data came from. Small steps are the best steps.
I’m going to introduce a mediating component between Application and Post that will be responsible for fetching the data. I’ll use the convention ConnectedXXX for a component that connects a view to its data provider.
Here it is (the data is still hard coded for the moment).
export function Post({post}) {
  return <div className='post'>
    <h2 className='title'>{post.title}</h2>
    <div className='body'>{post.body}</div>
  </div>
}

export default function ConnectedPost() {
  const post = {
    id: 1,
    title: 'React on Rails',
    body: 'I can use React with Rails.',
  }
  return <Post post={post} />
}
Notice that I used the default modifier when I exported the ConnectedPost. You can export multiple components (or functions or constants or whatever) from each Javascript file but only one of them can be the default.
When you import a component from another file, you can use named imports like this:
// Application.jsx
import {Post} from 'posts/Post'
...
<Post />
If I skip the braces and import the default export (ConnectedPost), I can call it whatever name I like. I’m gonna continue to call it Post (because the caller doesn’t need to know about implementation details like data providers), like this:
// Application.jsx
import Post from 'posts/Post'
...
<Post />
I won’t show the import statements in my code snippets any more unless there is something significant that I want to draw your attention to. The basic rules to remember are:
If you use a component from another file, you have to import it.
Remember to indicate whether you want the default component or a named component.
Import React in any file that uses JSX.
RubyMine takes care of imports for me magically so I am barely aware of them most of the time anyway.
Now that the post object is no longer hard-coded, we can update Post.test.jsx as a unit test for Post and pass the post in from the outside. We’ll test the ConnectedPost separately later.
  const post = {
    id: 1,
    title: 'The title',
    body: 'The body.',
  }

  test('shows a blog post', () => {
    const component = mount(<Post post={post}/>)
    expect(component.find('.title').text()).toEqual('The title')
    expect(component.find('.body').text()).toEqual('The body.')
  })
Before I do the next interesting change I need to introduce some new concepts. Let’s start with class components.
Class components
All of our components so far have been stateless so it makes sense that they are pure functions. We’ll need to maintain state for our ConnectedPost when it retrieves data from the server so we are going to convert it to a class component.
Aside: The React folks have added hooks to allow you to maintain state in a functional component but the whole thing still feels weird to me. I’m sticking with class components for now.
export default class ConnectedPost extends React.Component {
  render() {
    const post = {
      id: 1,
      title: 'React on Rails',
      body: 'I can use React with Rails.',
    }
    return <Post post={post} />
  }
}
This class component is exactly equivalent to the functional component that it replaced with all the rendering logic moved into a method called render().
Functional components are passed their properties as parameters to the render method like this render(props). Class components access their properties through an instance variable: this.props.
Class components give us two new capabilities. The first is state management.
State Management
React gives us a this.state instance variable that lets us keep track of internal changes to a component like when the user checks a box or presses a button. In our case, we are going to keep track of the post that we are fetching from the server.
There are three aspects to state management.
Initialize the state in the constructor.
Access the state in the render() method (and other methods as necessary).
Change the current state with this.setState().
The reason we are letting React manage our state rather than just using an instance variable is to give React the chance to re-render our component every time the state changes.
Let’s look at the first two aspects together. I’ll change the component to initialize the state with an empty post in the constructor and then access that post in the render() method.
Before I show you how to change the state, let me introduce the second capability of class components.
Lifecycle methods
The second new capability of class components is lifecycle methods. Lifecycle methods get called when a component is initialized or when some external event happens that the component needs to know about. The most important lifecycle method is componentDidMount().
I’m using axios rather than fetch. My reason is lost in the mists of time but I remember that fetch did something weird with 404 errors that I found annoying. Use fetch if you prefer.
We have to install axios with Yarn…
yarn add axios
…and import it at the top of the Post.jsx file.
import * as axios from 'axios'
We are finally displaying an actual blog post that we loaded from the server but the new changes broke our tests.
I find it hard to do test-first with UI components because I’m always in such a rush to see what the UI will look like. But test-last is better than no test, so let’s test now.
Jest is a unit testing library for Javascript and Enzyme provides an adapter that lets you interact with React components from your test code. We’ll install them using the Yarn package manager.
yarn add --dev jest
yarn add --dev enzyme
# Apparently enzyme-adapter-react-17 doesn't work.
# yarn add --dev enzyme-adapter-react-17

# But this does.
yarn add --dev @wojtekmaj/enzyme-adapter-react-17
Let’s create a test for our Application component.
// test/javascript/application/Application.test.js

import React from 'react'
import {mount} from 'enzyme'
import {configure} from 'enzyme'
// import Adapter from 'enzyme-adapter-react-17'
import Adapter from '@wojtekmaj/enzyme-adapter-react-17';

configure({ adapter: new Adapter() })

import {Application} from 'application/Application'

describe('The application', () => {
  test('shows the first blog post', () => {
    const component = mount(<Application />)

    expect(component.find('.site-name').text()).toBe('Blogging')
    expect(component.find('.title').text()).toBe('React on Rails')
    expect(component.find('.body').text()).toBe('I can use React with Rails.')
  })
})
mount() will instantiate your component, call all the React lifecycle methods (we’ll cover this later), render it and make the component available for you to write assertions against.
A note about rendering components with Enzyme.
Enzyme has three different methods for rendering a React component:
shallow(<C />) renders C but not its child components.
mount(<C />) renders C and, recursively, all of its children.
render(<C />)renders just the component’s HTML.
It took me a long time to realize that these three methods do totally different things and each has a totally different API. This confused the hell out of me for weeks. Once I realized that, I decided to just stick with mount() unless I have a very good reason to just do a shallow rendering which, so far, is never.
A minor rant about behavioural-style test frameworks
Way back when the first JUnit extensions appeared that let you write tests in pseudo-English so your customer could read them, or maybe even write them, Ron Jeffries said that this was a dead end.
Pseudo-English would always have an uncanny valley feel about it; the tests would be hard to read and harder to write. If programmers write tests, better that they use normal programming conventions that programmers can understand.
I didn’t listen.
After struggling mightily with Fit, Fitnesse, Cucumber, RSpec and God Knows What Else, I decided that maybe Ron had a point and went back to plain JUnit-style assertions.
In 20-something years, I’ve never had a customer who was interested in reading — never mind writing — these tests. Just write your best ruby/javascript/whatever and give the tests good names. It will be OK.
Running the tests
We have to tell Jest where to find the tests. Create jest.config.js in the root of your rails app.
If you sign in to CircleCI via your GitHub account, you can have CircleCI run your tests for you.
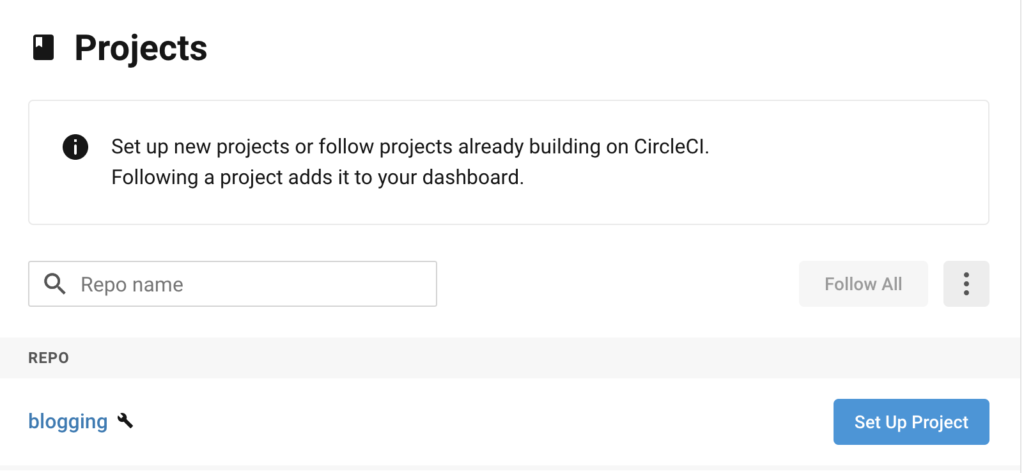
Click Set Up Project then follow the instructions to add the CircleCI config file to your project. I won’t repeat them here. If you are lucky, it will work first time.
If you are unlucky like me, you’ll have to copy a working config.xml from somewhere else. You can copy mine if you like. I had to add minitest-ci to my Gemfile to get the test results to show up. I got there in the end.
If you want to be really fancy, you can add the little badge that CircleCI generates to your README.md file.
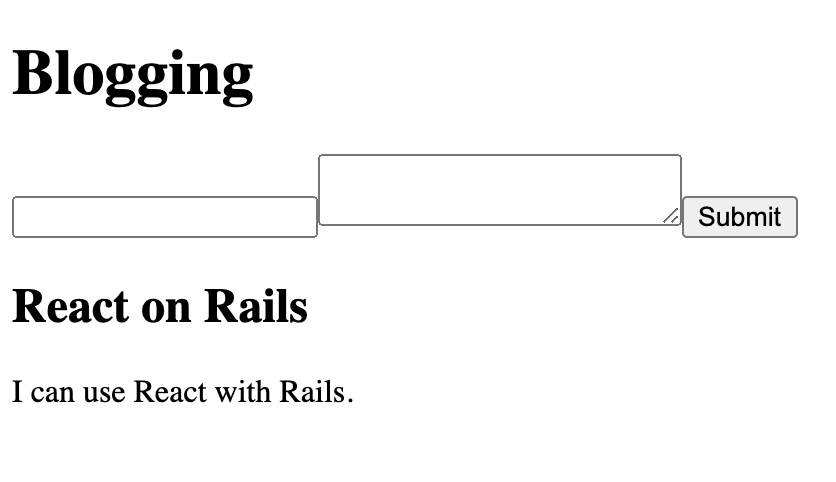
Let’s work on the React app that will turn our JSON into a beautiful blog post. I like to start with a completely hardcoded UI and work back incrementally from there until it connects with the JSON. We’ll start by deleting the Hello React app and replacing it with the real thing.
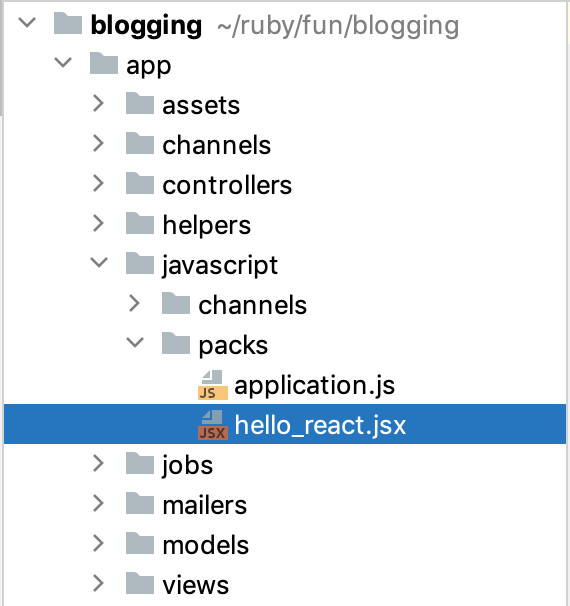
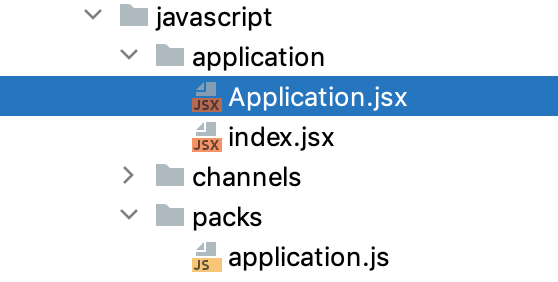
If you look under the app/javascript folder, you’ll see two packs.
We’ll delete hello_react.jsx and fix up the application pack to show our blog post. Webpacker gets its knickers in a twist when you delete a pack but stopping and starting webpack-dev-server will usually fix it.
I like to have a top-level Application component that acts as a container for everything else. I also like to group my components on the file system by domain rather than the more usual functional buckets.
Let’s create the Application component and initialize it. I’ll explain what it is doing afterwards.
// javascript/application/Application.jsx
import React from 'react'

export function Application(props) {
  return <div id='application'>
    <h1 className='site-name'>Blogging</h1>
    <h2 className='title'>React on Rails</h2>
    <div className='body'>I can use React with Rails.</div>
  </div>
}
A few things to note if you are new to React.
React has a syntax that looks a lot like HTML for describing views. But it’s not HTML, it’s JSX!
JSX is an extension to Javascript syntax that gets compiled into React components. It’s hard to love JSX and why anyone thought it was a good idea to write code with angle brackets in the 21st century, I have no idea. I thought I was done with remembering to close tags about ten years ago. Maybe I should learn Pug next.
The simplest React component is just a function that returns some JSX. That thing that looks a bit like a <div> tag with an id attribute… that will actually get compiled into code that creates a div component and sets the id property. React components are all about the properties.
You may remember that HTML has a class attribute. But class is a reserved word in Javascript so React uses className instead (React components use camelCase for property names). You’ll remember this after you get it wrong the first 27 times.
The usual trick for bootstrapping a React app is to look for an element in the DOM and then render your React component inside it.
# javascript/application/index.jsx

import React from 'react'
import ReactDOM from 'react-dom'
import {Application} from './Application'

document.addEventListener('DOMContentLoaded', () => {
  const react = document.querySelector('#react')
  ReactDOM.render(
      <Application />,
      react.appendChild(document.createElement('div'))
  )
})
Here’s that div element with id=’react’ on our index page. We don’t need to include the javascript_pack_tag because the application layout file already includes it.
# index.html.erb
<div id='react' />
The last thing is to point the application pack file at our index.jsx.
If you import a folder, Javascript looks for an index.js (or index.jsx) file and runs that. If you have been following along, your javascript folder should look like this:
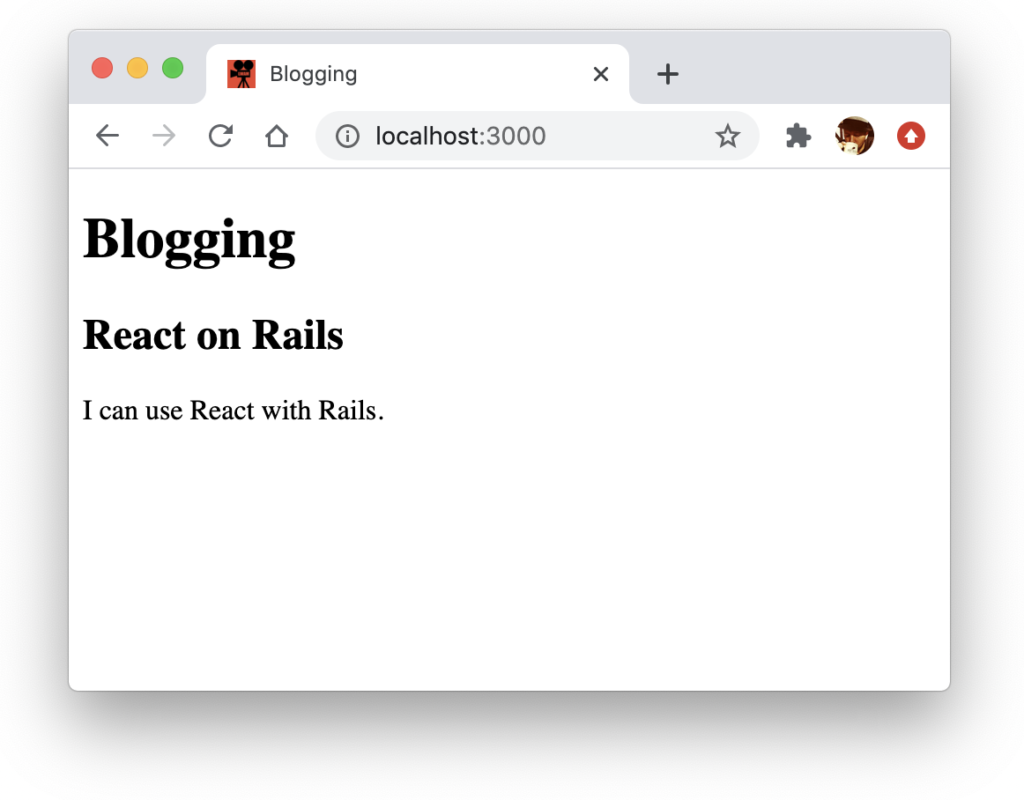
If you refresh your browser page now, it should look a bit like this:
So that’s our top level Application component done. In the next episode we’ll tidy it up a little and add some tests.
A quick bonus tip before I go.
I like to add an entry to /etc/hosts for each local project. It saves you from resurrecting the ghost favicons from long-forgotten projects and stops your cookies from colliding if you are working on multiple projects at the same time.
# /etc/hosts
127.0.0.1       localhost blogging.local
Rails requires you to declare the host name as a security measure.
# config/environments/development.rb
Rails.application.configure do
  config.hosts << 'blogging.local'
  …
Don’t forget to restart the rails server if you change the environment files.
We’ll start with the Post model first. I’ll keep the commentary to a minimum because you know this stuff already.
rails generate model Post title:string body:text
rails db:migrate
We’ll need a test framework. I like Minitest.
# Gemfile
gem 'minitest', group: :test
bundle install
I use TDD but you can do whatever you like. I’m not your dad.
I’ll fast-forward through the details.
require 'test_helper'
class PostTest < ActiveSupport::TestCase
  test 'a post has a title and a body' do
    post = Post.create! title: 'The title', body: 'The body.'
    assert_equal 'The title', post.title
    assert_equal 'The body.', post.body
  end
end
rails test

.E

Error:
PostsControllerTest#test_should_get_index:
NameError: undefined local variable or method `posts_index_url' for #<PostsControllerTest:0x00007f8939850650>
    test/controllers/posts_controller_test.rb:5:in `block in <class:PostsControllerTest>'
PostTest passes already but the auto-generated PostControllerTest is failing because the path is wrong. Let’s fix that.
require 'test_helper'
class PostsControllerTest < ActionDispatch::IntegrationTest
  test 'should get index' do
    get posts_url
    assert_response :success
  end
end
Our React app is going to need some JSON. Let’s add a show action to PostsController.
require 'test_helper'
class PostsControllerTest < ActionDispatch::IntegrationTest
  setup do
    @post = Post.create! title: 'The title', body: 'The body.'
  end

  test 'fetch a post as json' do
    get post_url(@post, format: :json)
    assert_response :success

    json = JSON.parse response.body, symbolize_names: true
    assert_equal @post.id, json[:id]
    assert_equal 'The title', json[:title]
    assert_equal 'The body.', json[:body]
  end
end
# PostsController.rb
class PostsController < ApplicationController
  before_action :set_post, only: :show

  private
  def set_post
    @post = Post.find params[:id]
  end
end

# views/posts/show.json.jbuilder
json.extract! @post, :id, :title, :body, :created_at, :updated_at
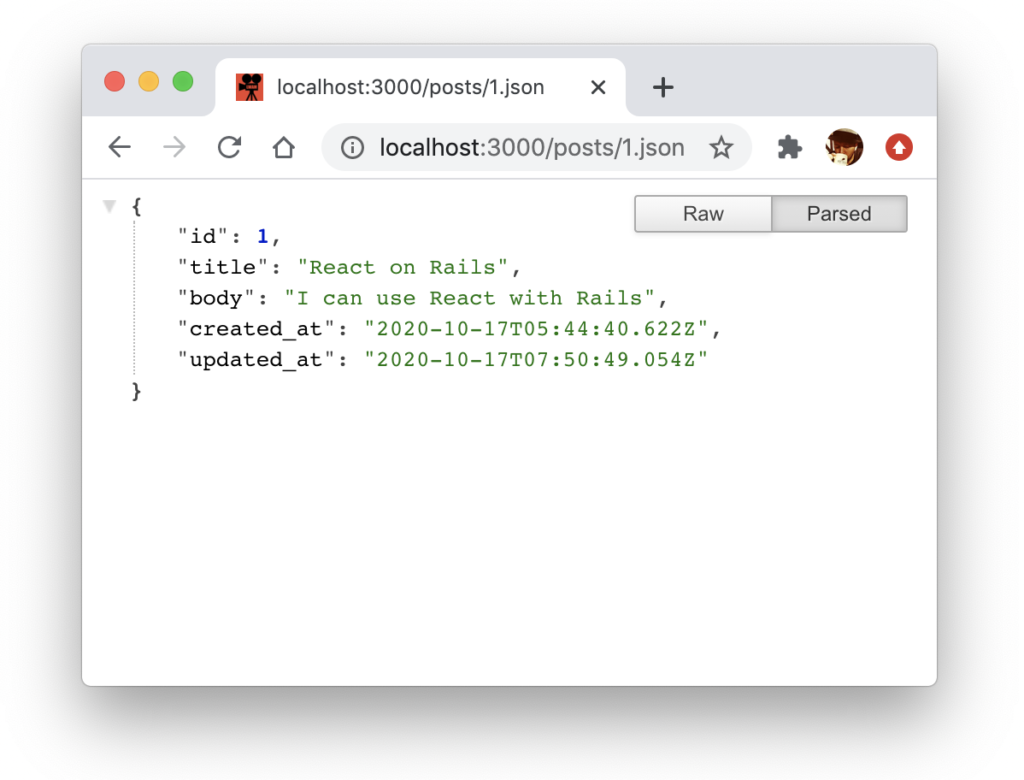
Let’s create a post so we can see what the JSON looks like.
# In the rails console
Post.create! title: 'React on Rails', body: 'I can use React with Rails.'
I have Ruby v2.6.7 installed using rvm and I’ll use Homebrew to install Node and Yarn on my Mac.
Installing software tends to either go swimmingly or you end up drowning in a Pool of Despair. In the Pool of Despair case, extra instructions don’t seem to help very much so I’ll keep mine to a minimum.
Yarn is the equivalent of rubygems in the Javascript ecosystem. We’ll use yarn to install node packages.
Open a terminal and go to that favourite part of your hard drive where you keep all your future dreams and create a rails project.
rails new blogging --database=postgresql --webpack=react --skip-turbolinks --skip-spring
Go make a cup of tea while that is installing.
I use PostgresSQL because it makes deploying to Heroku easier. Use SQLite or MySQL if you prefer.
I don’t like Turbolinks.
On four Mac Books in a row, Spring always pegs my CPU at 100% and I don’t know why.
–webpack=react will install Webpack and the node packages for React.
Webpack replaces Sprockets for processing Javascript assets but we’ll still use Sprockets for CSS because I haven’t figured out to use Webpack for CSS yet and everyone says it’s complicated.
If the install gods are on our side we can create the database, start the server and see the happy, happy Welcome to Rails banner.
rails db:createrails server
# Then in a new terminal
open http://localhost:3000/
When we created our Rails project, Webpacker created a HelloReact app. We can use that to test that React installed correctly. We’ll create a posts controller to initialize HelloReact and we’ll set it as the home page in routes.rb.
rails generate controller Posts index
#routes.rb
Rails.application.routes.draw do
  root to: 'posts#index'
  resources :posts
end
Webpacker compiles javascript modules into packs and the javascript_pack_tag method will include your pack on a page. We’ll call it from the index page.